How to Change WiFi Router Login Password?
In today’s digital age, maintaining a secure Wi-Fi network is crucial for safeguarding your personal information and protecting your devices from unauthorized access. Changing your router’s default login password and Wi-Fi SSID and password is one of the most fundamental steps in bolstering your network’s security. This guide will walk you through the process of changing these settings using both the router’s web console and its mobile app for a convenient and secure experience.
Why You Should Change Security Settings?
Creating your own unique and strong password adds an extra layer of security to your network. This password should be complex and difficult to guess, with a combination of letters, numbers, and symbols. Additionally, it’s important to change this password on a regular basis to maintain maximum security.
All modems and routers have default configurations, including the device IP address, Router’s Login password , Network’s connection password and the WiFi network’s Name(SSID). By taking simple steps and changing these settings, you can safeguard your personal information and ensure your network remains secure.
Changing the Router’s Default Login Password
The default login password for your router is typically printed on a label on the back of the device. This password is known to the public, making it an easy target for unauthorized access.
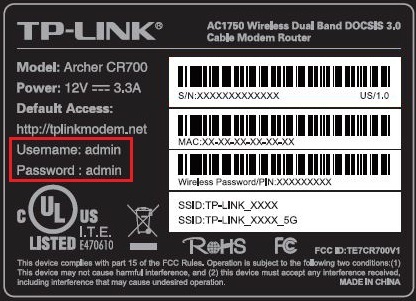
Locate the router’s default login credentials for initial access to its settings
Changing this password to a strong, unique combination of characters will significantly enhance the security of your router settings. Read More: How to Create a Strong password?
Method 1: Using the Web Console
A router web console is a web-based user interface (UI) that allows you to manage your router settings from a computer or mobile device. This interface usually provides access to a variety of features. Read More: How to Access Router’s Web Console
- Locate the Default IP Address: Access the router’s configuration page by entering its default IP address in a web browser. This address is typically printed on the router’s label. For instance, if the IP address is 192.168.1.1, type it into the address bar of your web browser.
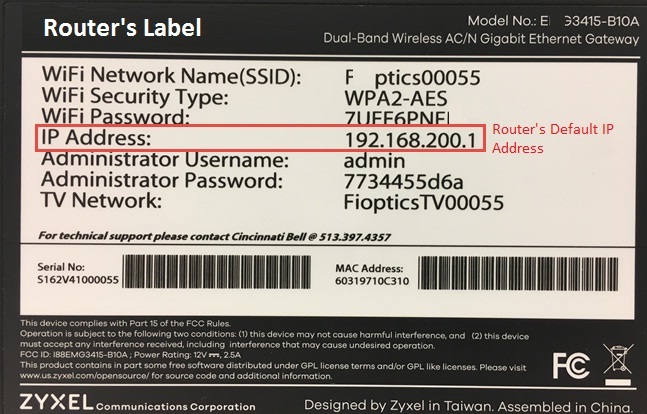
Identify the router’s default IP address for easy access to its configuration page
- Enter Default Login Credentials: Once the configuration page loads, enter the default username and password provided on the router’s label.
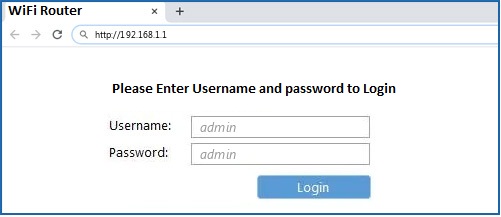
Access your router’s settings
- Navigate to the Password Management Section: Look for the section dedicated to password management or user settings.
- Change the Password: Enter a new strong password, ensuring it includes a combination of uppercase and lowercase letters, numbers, and special characters. Repeat the password for confirmation.
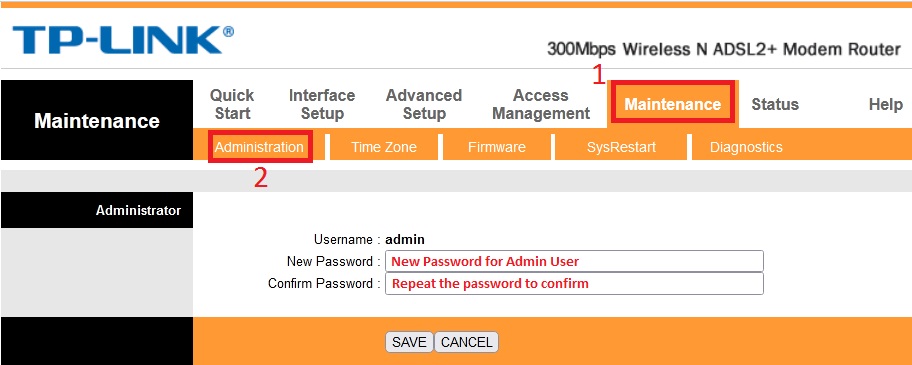
Change Router’s Login Page Username and Password
- Save the Changes: Click the “Save” or “Apply” button to save the new password settings.
Method 2: Using the Mobile App
Many routers come with a mobile app that makes it easy to change your password and manage other settings from your smartphone or tablet. It usually provides access to the same features as the web console, but it’s often easier to use and more visually appealing.
- Download the Router’s Mobile App: Visit the router manufacturer’s website or app store to download the dedicated mobile app for your router model.
- Create an Account or Login: Open the app and create an account or log in using your existing credentials.
- Access the Password Management Section: Locate the option to view or change your router’s login password.

Change Router’s Login Username and Password Using Mobile App
- Enter a New Password: Enter a strong password similar to the process using the web console.
- Save the Changes: Proceed to save the newly entered password.
Changing Wi-Fi SSID and Password
The Wi-Fi SSID is the name of your wireless network, and the password is the key that allows devices to connect to it. Changing both the SSID and password can protect your network from unauthorized access and prevent others from accessing your personal information.
Method 1: Using the Web Console
- Locate the Wi-Fi Settings: Navigate to the section of the router’s configuration page dedicated to Wi-Fi settings.
- Change the SSID: Enter a new, unique name for your Wi-Fi network, avoiding common words or personal information.
- Change the Password: Enter a strong password for your Wi-Fi network, ensuring it follows the same guidelines as the router’s login password.
- Save the Changes: Click the “Save” or “Apply” button to save the new Wi-Fi settings.
Method 2: Using the Mobile App
- Access the Wi-Fi Settings: Locate the option to manage or change Wi-Fi network settings within the mobile app.
- Modify the SSID: Enter a new, unique name for your Wi-Fi network.
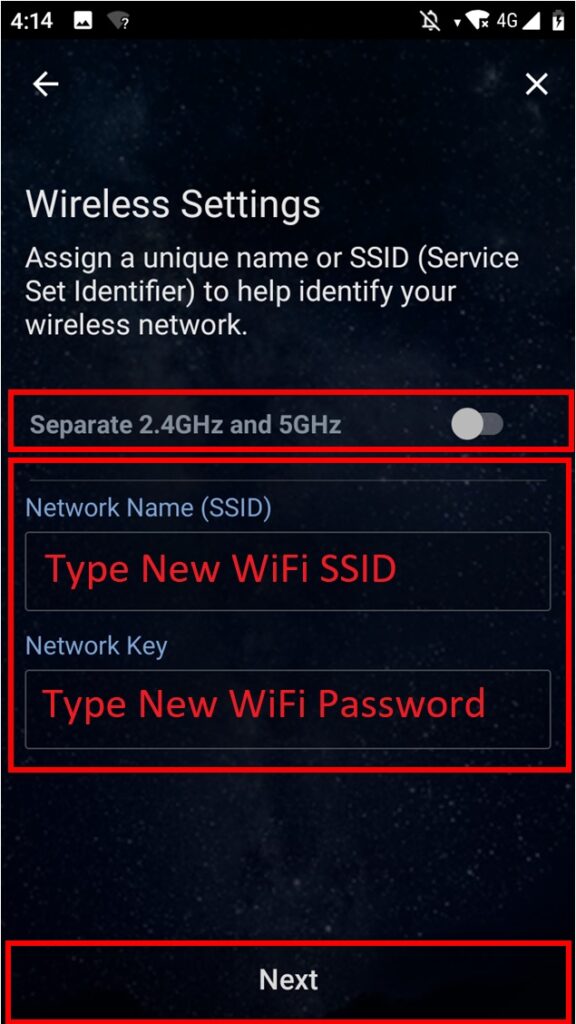
Change SSID and Password Using Mobile App
- Change the Password: Enter a strong password for your Wi-Fi network.
- Save the Changes: Save the new Wi-Fi network settings.
Conclusion
Changing your router’s login password and Wi-Fi SSID and password is an essential step in securing your Wi-Fi network and protecting your personal information. By following the guidelines outlined in this guide, you can effectively safeguard your network from unauthorized access and enhance your overall online security.