How to Setup Linksys WiFi Router
Setup By Mobile App
Here you will learn how to setup Linksys WiFi router by using the official mobile application. First, download the company’s official app from here and follow the instruction below.( please note that only the main steps are mentioned).
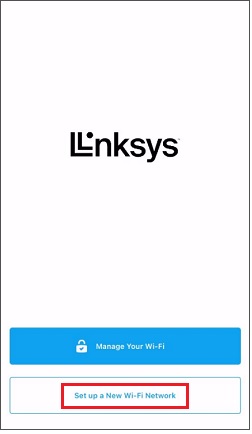
Step1 : Execute the Linksys app and tap on Set up a New WiFi Network.
Set up New WiFi Network
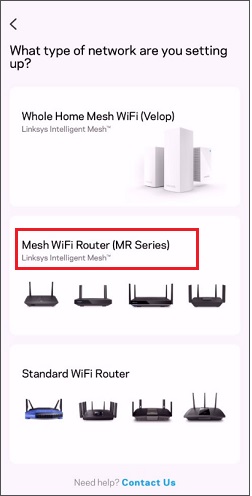
Step2: Choose Mesh WiFi Router Series.
Mesh WiFi Routers Series
Step3: Tap on I would rather set up without Bluetooth

Continue Without Bluetooth
- Note : Before continue , you should connect your mobile device to the default WiFi name (SSID), and enter the default password located on the bottom of the node.
Step4: Make sure your modem has turned-on and connected to your Linksys WiFi Router ( Connect the modem to the WiFi router’s WAN port , if you have any problem with this step , please read this post How to Connect Modem to WiFi Router? )
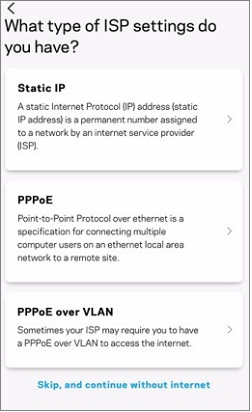
Step5: The WiFi router should detect the internet, Otherwise tap the Do you have ISP settings to enter link and select your internet connection type.
Choose Your Internet Connection Type
Step6: Create a Linksys cloud account or tap on Log in here to enter your existing credentials.
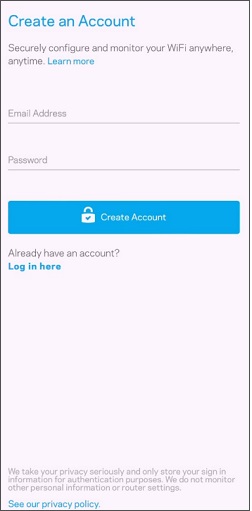
Create an Account
Step7: Personalize your WiFi network by creating a WiFi name (SSID) and Password then tap on Next.
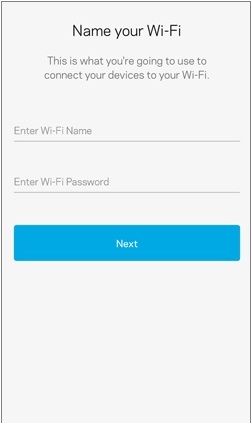
WiFi Network SSID and Password
Step8: Select a name that best describes the location of the router you are currently setting up and tap on Next. ( Only used for naming purposes)
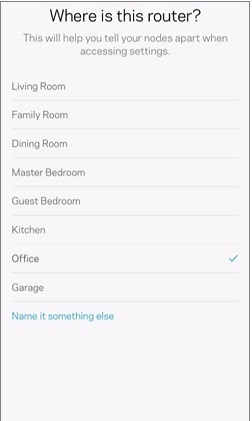
Router’s Location
Step9: If you have another WiFi router (node) to add, tap on Add a Node, otherwise, tap on Skip this step. You can always add a node to your network at a later time.
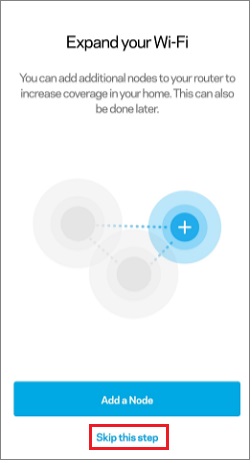
Add another node or Skip to Continue
Step10: Tap on Go to Dashboard. Your WiFi should now be ready. You can now connect your WiFi clients to your WiFi including the mobile device you used for setting up the node.
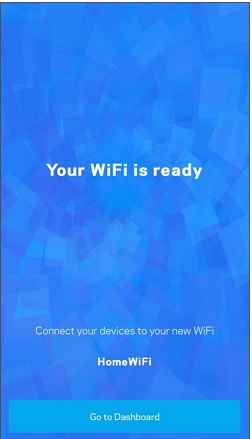
Your WiFi is Ready
Setup By Web Browser
Here you will learn how to set up a Linksys wireless router by using the web browser. Follow the instruction below.( please note that only the main steps are mentioned).
Step1: Connect your computer to the default WiFi network of the router. Look underneath the router for the default WiFi name and password.
Choose Your WiFi to Connect
Step2: Open a web browser and enter the default IP address 192.168.1.1 of your router in the Address bar then press [Enter].
Step3: On the setup screen, click on the mobile image.
Click on Mobile Image
Step4:Enter “admin” as the default administrative router password and then click Sign In.
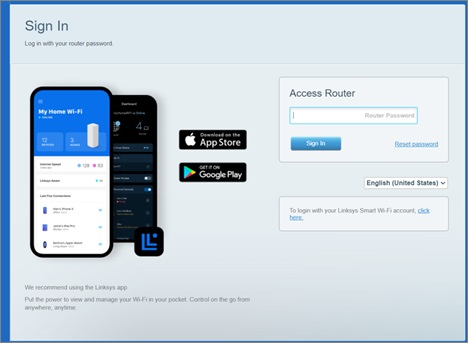
Enter Router’s Password
- You will be redirect to the dashboard.
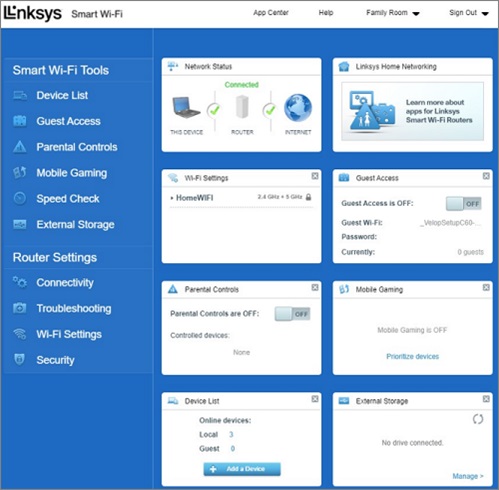
Dashboard Page
Step5: For security reasons ,you must first change your default admin password. Click Connectivity under Router Settings and then click on Edit on the Basic tab. Click Apply when done.
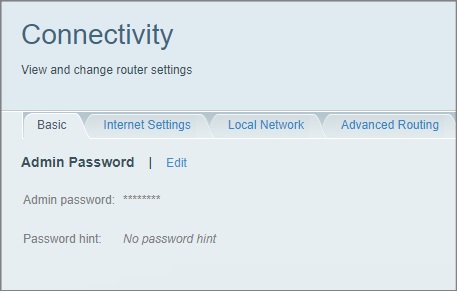
Connectivity Check
Step6: Go to the Router Setup tab and create a WiFi name (SSID) and WiFi password. Once done, click the Setup Node button. The WiFi password is case sensitive.
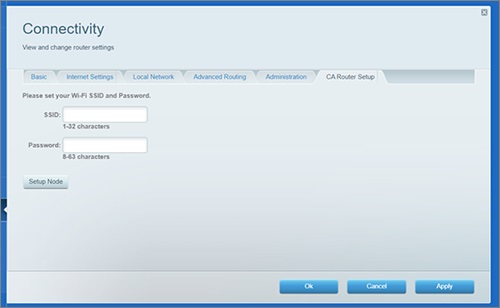
Set SSID and Password
- NOTE: The Router’s SSID has changed , so you will lose your WiFi connectivity.
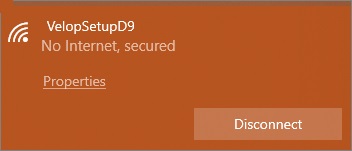
Step7: The light on top of the node will start to flash. Once you see your new WiFi name in the list, connect to it to continue the setup.

Connect to new WiFi Network
Step8: Now check if your node is online. If the light on the node is solid blue, your node is online.